The Development of Modern Sewing Techniques
Although some techniques are the same or similar; overall, sample making procedures, where one person sews the entire garment, differ significantly from home sewing techniques. Sample making is usually done in the designing departments. Sample makers sew using the factory’s sewing procedures.
During the First and Second World Wars the United States developed the apparel production techniques now used globally. Even in industry, because the work is line assembly, few know how the whole system works. However, sample makers are probably the most knowledgeable, as they have learned their skills in the factory before moving into the designing department where they were able to observe the designers and pattern makers.
The two methods are best compared by describing the procedures used in the home by a home sewer, and those used in the home by a sample maker. Although some home sewers may think that because they sew the entire garment, as do sample makers, they would qualify as sample makers. But this is not the case.
Although I know both, industrial sample making is so superior, and so much easier than home sewing methods, that I never use home sewing methods. Over the last 30 years I have written down how sample making is done in my eight-book series that are available from my website. The books were college-classroom tested with continuing professional students, including design-room professionals as they were written .

If you want beautiful clothing that fits that you would never afford to buy, consider learning sample making. Minimal equipment is needed. All work can be done in the home. Most high-end sewing requires minimal equipment. It can be done on a sewing machine no more complicated than a treadle or featherweight.
Home Sewing Procedures
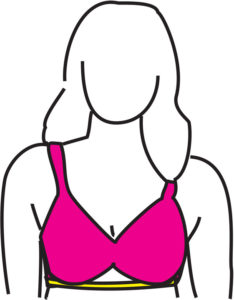
- Buy pattern and fashion fabric. Choose pattern size based on bust circumference.
- Fold the fabric lengthwise.
- Lay the patterns on the fabric. Cut on the fold.
- Cut V-notches.
- Pin the seams together before sewing.
- Sew the garment pieces together on a 5/8 inch seam allowance.
- Clip curved seams’ allowances.
- Set zippers last.
- Trim the seam allowances. Overcast them.
- Try the garment on. Correct the fit.
- Rip out seams where needed.
- Resew the seams that need fit corrections.
Sample Making Procedures
- Choose the pattern based on the chest size. Choose fabric based on personal color palette. Choose pattern based on wardrobe style.

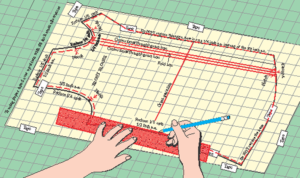
Trace the pattern, reducing the seam allowances as you do so. - Trace the pattern, reducing (or increasing the straight) seam allowances as the patterns are traced.
- Check the patterns for mistakes, making sure all seams sew and that sleeve cap notches sew to armhole notches. Correct any mistakes found.
- If needed, inset, reduce, and/or move the bust darting.
- Cut a muslin from the pattern shell.
- Cut notches with 1/8 inch deep snips. Center-front, center-back notches are cut with 1/8 inch deep Vs. V-notches also are cut if a 1/8 inch notch snip is cut at the incorrect position.
- Fit the muslin, move the fit corrections to the traced pattern.
- The muslin is fitted. Corrections are moved to the traced pattern, ensuring that the sewn garment will not need fit corrections.
- If considerable fit corrections are needed, cut a second muslin, correct the fit, then correct the pattern shell.
- Draft supporting patterns from the corrected pattern shell.
- Lay the fabric on the open. (NOTHING in industry is EVER cut on the fold.) Check that the fabric is on grain. Cut the fabric.
- Set the zipper first, or as soon as possible.
- Sample makers prep (overcast) the seams before sewing them. This is optional when using sample making procedures in the home. Overcasting the seams after they are sewn prevents any change in the seam allowances’ widths.
- Sew on gauge, up from the hem on the varying seam allowances. Sew notch-to-notch, without pinning. Pins are only used if sewing a difficult seam, such as a collar to a neckline.
Sample Making Benefits
- Sewn garment needs no corrections – looks new.
- Setting the zipper as soon as possible is easier, as it eliminates manipulating the entire garment under the machine as the zipper is sewn.
- Varying the seam allowances’ width eliminates the need to clip seams.
- One has control over the entire procedure.
- Because the pattern is traced, one can go back and check one’s work.
- The varying seam allowances eliminates the need to trim the seam allowances. Trimming seams after they are sewn means the garment is cut out twice.
- Cutting the pieces with varying seam allowances creates a cleaner look inside the garment.
- One has a finished pattern that fits. It can be reused (and perhaps manipulated into another style) with confidence.
Thanks for reading.
Laurel
https://laurelhoffmann.com/
LaurelHoffmann-YouTube
https://www.facebook.com/CFashionEdu
https://www.linkedin.com/in/laurelhoffmann/
RSS Feed: https://laurelhoffmann.com/blog/
https://www.ravelry.com/projects/LaurelHoffmann
https://www.yelp.com/biz/laurel-hoffmann-oreland
https://www.thumbtack.com/pa/philadelphia/drawing-lessons/fashion-drafting-sewing-books-classes
